> For the complete documentation index, see [llms.txt](https://docs.growthfactor.ai/llms.txt). Markdown versions of documentation pages are available by appending `.md` to page URLs; this page is available as [Markdown](https://docs.growthfactor.ai/data-and-analytics/points-of-interest.md).
# Points of Interest
The Points of Interest (POI) layer displays local businesses surrounding your selected location or trade area. This layer helps you visualize the commercial landscape and business density in a given area, with filtering options to focus on businesses relevant to your analysis.
***
### Overview
When enabled, the POI layer overlays business markers on the map representing nearby businesses. This information is valuable for:
* Understanding the types of businesses operating near a potential site
* Identifying commercial corridors and retail clusters
* Evaluating the overall business density of an area
* Discovering neighboring tenants and co-tenancy opportunities
### Enabling the POI Layer
{% columns %}
{% column %}
1. Click the **Layers** button in the top navigation bar
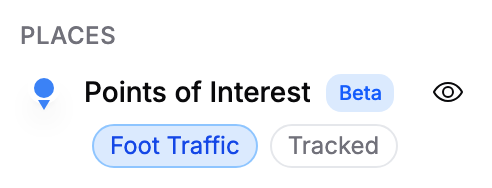
2. Under **Places**, locate **Points of Interest**
3. Click the visibility icon to toggle the layer on or off
{% endcolumn %}
{% column %}
{% endcolumn %}
{% endcolumns %}
***
#### POI Layer Filters
When the Points of Interest layer is enabled, two filter buttons appear below it in the layers panel. These filters let you refine which businesses are displayed.
**Foot Traffic Filter**
Click the **Foot Traffic** button to show only businesses that have foot traffic data available.
* **When enabled (blue):** Only businesses with foot traffic data are displayed
* **When disabled (gray):** All businesses are displayed regardless of data availability
**Tracked Filter**
Click the **Tracked** button to show only businesses that match your organization's configured brand or category preferences — those marked as Attracts, Avoid, or Neutral.
* **When enabled (blue):** Only tracked businesses are displayed
* **When disabled (gray):** All businesses are displayed, including untracked ones
***
### Business Popup
Click a business marker to open its popup. When opening hours are available for the business, an **Operating Hours** section appears in the popup. Click it to expand the weekly schedule, Monday through Sunday. Days with no known hours show a dash, and businesses open around the clock show **Open 24 hours**.
The section stays expanded or collapsed as the popup updates while you have it open. It doesn't appear for businesses without hours data.
***
### Editing What's Shown
You can change which brands and categories display on the Tracked POIs layer directly from the map. Your edits are personal to you and don't change the workspace settings.
#### Workspace Defaults vs. Your Custom Set
{% columns %}
{% column valign="middle" %}
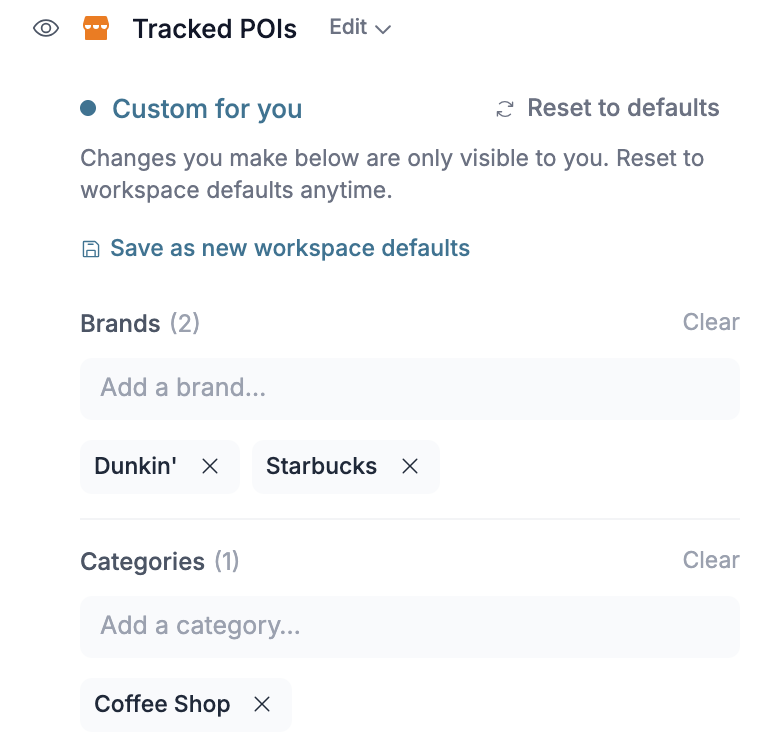
The header of the editor tells you which set you're looking at:
* **Using workspace defaults** — the tracked brands and categories configured in [Workspace Settings](/getting-started/workspace-settings.md), shared by everyone in the workspace
* **Custom for you** — your own set, marked with a colored dot
{% endcolumn %}
{% column %}
{% endcolumn %}
{% endcolumns %}
#### How It Works
1. With the Tracked POIs layer enabled, click **Edit what's shown** below the layer toggle
2. Add or remove brands in the **Brands** section and categories in the **Categories** section
There's no confirm step. Each change saves and takes effect on the map right away. **Clear** empties a whole section.
You can also ask the [GrowthFactor Agent](/study/growthfactor-agent.md) to do it, for example "Add Starbucks as a tracked brand" or "Mark Walmart as Avoid." The agent can list what you track, add or remove brands and categories, and set each as Attracts, Avoid, or Neutral. It saves the same personal set as the editor, and the map redraws when it finishes.
#### Getting Back to Workspace Defaults
* **Reset to defaults** — appears while you're in **Custom for you**. Discards your custom brands and categories and follows the workspace defaults again. A confirmation dialog appears first.
* **Refresh defaults** — appears while you're **Using workspace defaults**. Pulls in the current workspace settings.
#### Saving Your Set to the Workspace
Admins in **Custom for you** mode also see **Save as new workspace defaults**. This overwrites the workspace's default brands and categories for every member, so a confirmation dialog appears first. The option requires a preset to already exist in Workspace Settings.
***
---
# Agent Instructions
This documentation is published with GitBook. GitBook is the documentation platform designed so that both humans and AI agents can read, navigate, and reason over technical content effectively. Learn more at gitbook.com.
## Querying This Documentation
If you need additional information that is not directly available in this page, you can query the documentation by asking a question.
Perform an HTTP GET request on the following URL with the `ask` and `goal` query parameters:
```
GET https://docs.growthfactor.ai/data-and-analytics/points-of-interest.md?ask=&goal=
```
`ask` is the immediate question: it should be specific, self-contained, and written in natural language.
`goal` is what the user is ultimately trying to achieve, the reason they need the answer. Sharing it helps GitBook give you a better, more relevant answer. A goal is most helpful when it describes the outcome the user wants rather than restating the question. For example, with `ask=how do I create an API token`, a goal like `automate deployments from our CI pipeline` lets GitBook tailor the answer to that use case.
The response will contain a direct answer to the question and relevant excerpts and sources from the documentation.
Use this mechanism when the answer is not explicitly present in the current page, you need clarification or additional context, or you want to retrieve related documentation sections.